How to Build Your Own Kegerator
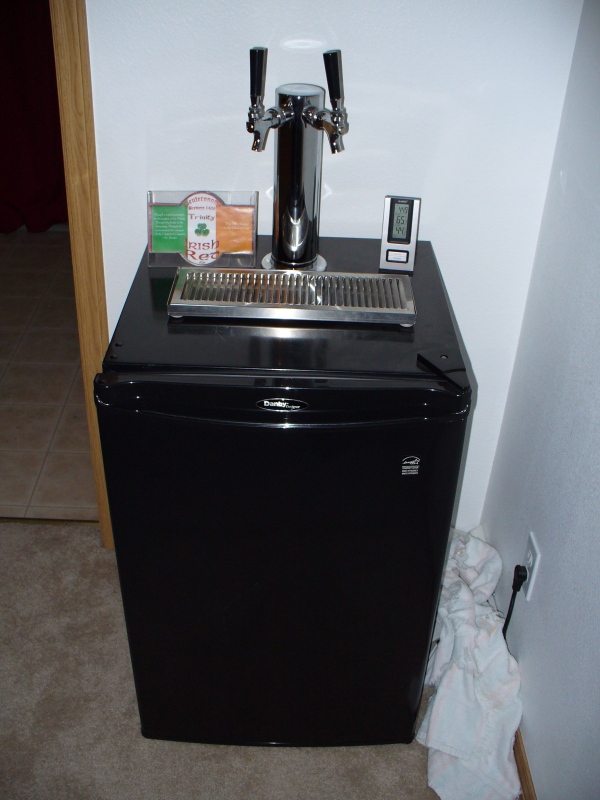
This page is a step-by step guide showing how my friend Andy and I build my kegerator. I am quite pleased with how it turned out. It is such a kick having fresh home-brewed beer on tap, and it beats the heck out of bottling and waiting for the beer to condition.
I found building my kegerator to be fun, rewarding, and a slight cost savings over buying one. I could also customize the size and number of taps. Hopefully you will find this guide helpful if you decide to build one.
1.) Picking the Right Fridge
I looked all over the internet to try to find the best mini-fridge to convert to a kegerator. I heard some horror stories about some guys who drilled through the top of their fridge and hit a refrigerant line and totally ruined it. I finally settled on the Danby DAR440BL. It was just the right size to hold 2 corny kegs and a 5 lb CO2 bottle with regulator. Also, by all accounts it doesn’t have any refrigerant lines running over the top. I had to order this fridge on the internet from Wal-Mart because it wasn’t sold in my state. That was easy enough, because I had them deliver it to my local Wal-Mart for free and I picked it up.
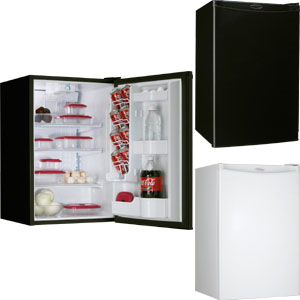
If this fridge is no longer on the market or you’d rather use another one, you certainly can. Just make sure it has removable shelves and enough room to store the number of corny kegs you want to hold. I had to take the plastic molding and shelving off the door of the Danby in order to fit the two kegs. If you use another fridge I recommend calling the company to make sure the area you are planning on drilling through is free from cables and lines. Also, use the heat test that I will show later.
2.) Ordering Your Keg Equipment
In addition to the fridge there are several other items you will need to build your kegerator. These include:
- Corney kegs
- Co2 bottle
- Regulator
- Keg tower
- Keg lines
- Drip Tray
I purchased two conry kegs, lines, the C02 bottle and regulator from Midwest Supplies as a set. The kegs were used but in good condition and it came with a nice C02 regulator for each keg and one to tell me when the bottle was low. Here is the link to this kit.
Drip trays are way too expensive for the purpose they serve (in my opinion). I looked all over the place and found one that was fairly cheap. It was from an E-bay store called Kegworks. Here is the link.
I ended up also buying the 14 7/8″ metal grate because I hatted the plastic look (just my preference).
I purchased the keg tower from Beverage Factory. It was the D4743DT 3″ Chrome Plated Metal Dual Faucet Draft Beer Tower. $92 was the cheapest I could find for this part. Here is the link.
I also had to purchase a piece of Plexiglas (30″x36″) and some screws to mount the tower from Home Depot and a plastic cutting board.
3.) Drilling the Hole in the Top of the Fridge
This is the most nerve-racking part of this project. Even though I had read that this fridge was OK, I was still very reluctant to do this. The Danby fridge does have a line running over the top but it is at the front. We are drilling at the back. I can assure you it is OK for this Danby fridge if you follow these steps.
If you want to be extra sure you’re OK (or if you are using a different fridge) there is a way to identify any refrigerant lines on the top of the fridge. First, plug the fridge in and turn the thermostat to full cold. Let it do its thing for about an hour so that the refrigerant lines get really hot. Then mix up a batch of corn starch and rubbing alcohol into a paste and smear it onto the top of the fridge. You want it to be about the consistency of glue or paste. The area above the refrigerant line will dry first because of the heat.

Remove all the shelving from inside the fridge. Then I put some crate paper on the top of the fridge and taped it down securely. We then traced out the obstacles on the inside of the fridge on this crate paper. This required a lot of measuring.
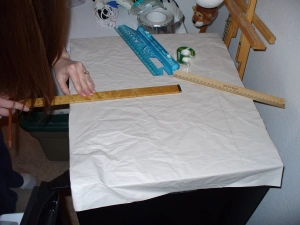
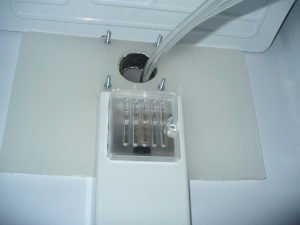
It was important to outline the sensor, light and cord that are mounted to the ceiling of the inside of the fridge. You can see the trace below. I also traced out the 2 1/8″ hole that I will drill through the fridge. I centered this hole between the coils mounted to the back of the fridge and the sensor unit.
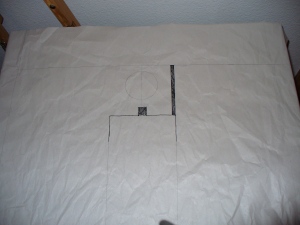
I then carefully cut through the crate paper and the metal of the fridge using a 2 1/8″ hole saw (drill bit attachment). As soon as I made it through the metal I stopped to make sure there were no wires in the way.
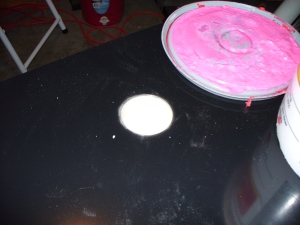
I then slowly cut through the rest of the insulation and through the plastic on the inside of the fridge. The next step is sealing the exposed insulation so it doesn’t get wet and deteriorate. My friend Andy happened to have some industrial insulation sealant so I used that. This is expensive so if you don’t happen to have “RedGard” lying around you can skip this step.
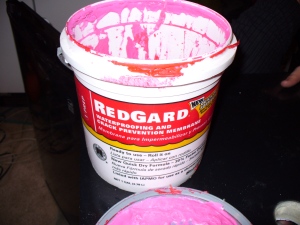
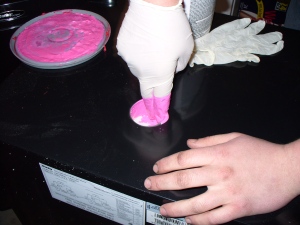
After I let the RedGard dry, I sealed over this some aluminum tape. Don’t skip this step because you need to keep moisture out of the insulation.
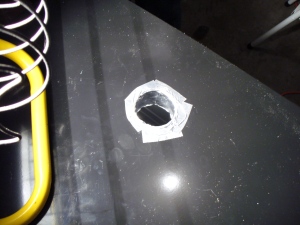
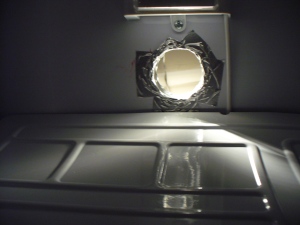
Here’s the whole from inside.
4.) The Rigid Support and Mounting the Tower
Then I used a permanent marker to trace the pattern from the crate paper on the plastic cutting board. This cutting board will be used to mount the keg tower to and will go on the inside of the fridge. This will make the keg tower more rigid than if it was just bolted to the plastic fridge. You could use a different material than the cutting board if you want but it needs to be rigid, waterproof, and as cheap as possible. This was the best thing I could find. Don’t use wood or it will rot because of the humidity in the fridge.
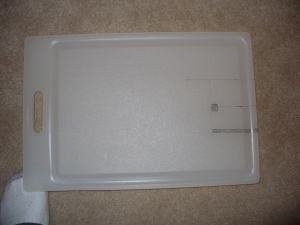
Then Andy and I used a table saw to cut the cutting board and we used the drill bit to cut the hole. Andy adjusted the height of the blade on the table saw to cut a groove in the board where the cord for the sensor runs.
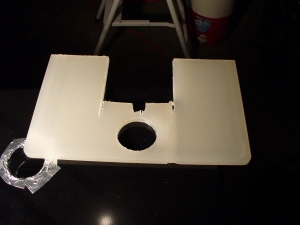
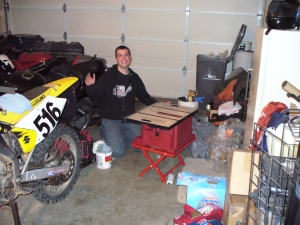
Andy using his new table saw.
We then placed the keg tower on top of the fridge and drilled the holes for the mounting screws. BE CAREFUL NOT TO HIT THE SENSOR BOX OR CABLE!
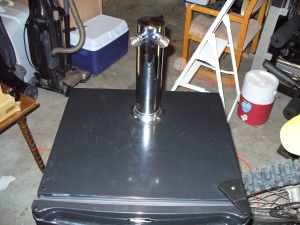
I held up the cutting board to the top of the inside of the fridge while Andy drilled the holes so they would go through the fridge and the cutting board. Then we mounted the tower to the cutting board using some screws we purchased at Home Depot. They needed to be a little longer than the ones that came with the keg tower.
5.) The Door
We then pulled back the rubber door seal and unscrewed all the screws that mounted the white plastic molding to the inside of the door. There were like 30 screws that had to come off to remove this piece. Once this plastic piece was off I used it to trace it’s outline on the piece of Plexiglas we had purchased from Home Depot.
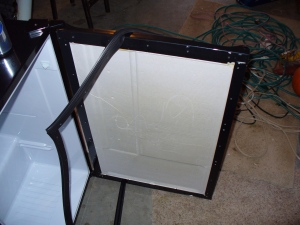
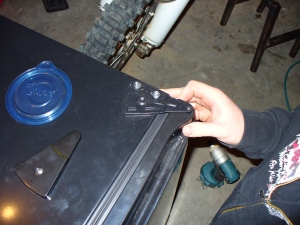
Then Andy cut out the Plexiglas following the lines we traced using the white plastic molding. and we drilled holes where all the screws mounted. Then we placed the Plexiglas where the plastic had been. The Plexiglas is needed to keep moisture out of the door insulation. Here is Andy putting all the screws back in.
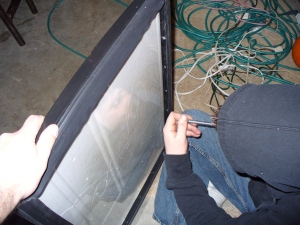
The Plexiglas was a little thicker than the white plastic molding had been, so the door wouldn’t quite close. All that was needed was to adjust the door clearance at the hinge so that the door closed evenly.
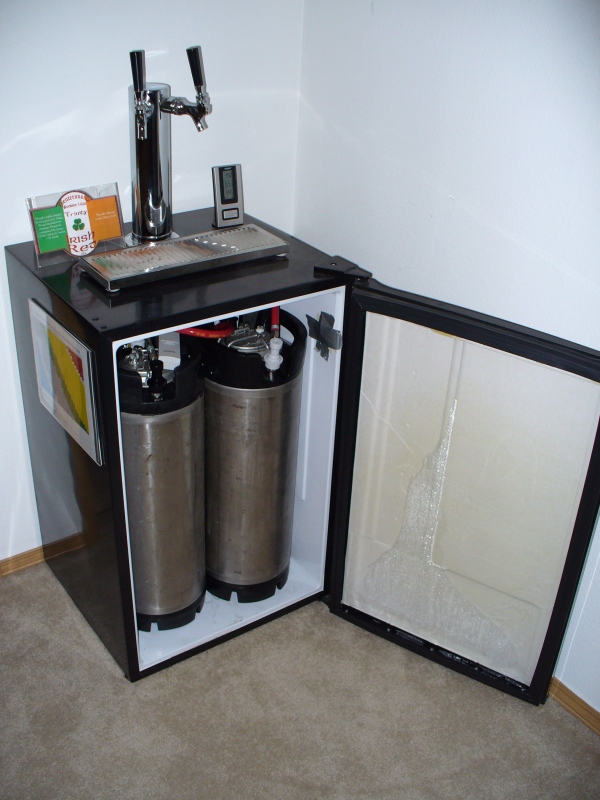
Here’s the converted kegerator.
Total Cost
Total expenses for the kegerator were broken out as follows (prices include shipping and tax):
Fridge $199.62
Drip Tray $58.79
Metal drip tray cover (not necessary) $42.57
Keg tower $105.74
Corny kegs, regulator, and CO2 tank $225.89
.236 gauge 30″x36″ Plexiglas (too thick) $41
Tape (already had)
Cutting board ~$11
Screws/bolts ~$4
Total $646-$689
Comments and Improvements
I have seen on the internet where some people have built elaborate fans to force cold air up into the tower to keep the keg lines cold. In theory, it is important to make sure the beer doesn’t warm up too much on its way to the tap or foaming can ensue. I decided that I would only try to build such a contraption if I found it to be necessary. I have been using this kegerator for about 7 months now with no foaming problems. The tower is insulated and the beer spends minimal time in the line. It comes out of the tap plenty cold. In short, I wouldn’t waste the time or money worrying about heat gain in the keg lines.
One issue I have noticed to be somewhat of an irritation is that the fridge allows the temperature to fluctuate quite a bit. There is a dial that allows you to change the minimum temperature in the fridge. This fridge is quite capable of cooling to below freezing (if you were so inclined), but the built-in thermostat will shut off the compressor and allow the fridge to warm back up to ~45F before it turns back on. It warms up to 45F regardless of where you position the thermostat dial (only the low temperature changes). I actually charted the temperature over a couple hours (I know I am such a geek, but I guess that’s why I’m an engineer) and saw this cycle repeated several times.
It may seem like this doesn’t matter, but if you are a nit-picky home brewer (like me) you really need a consistent temperature to control the amount of CO2 dissolved in your beer. I spend a good bit of time making sure my bottled beer has just the right amount of corn sugar or extract to produce just the desired volumes of CO2 for each of my beers, so I really want to be able to have that control over my kegged beer as well. I also want to be able to dial in the serving temperature for a specific beer.
In light of this, I do plan to fix this problem in the future. I will need an external thermostat controller to do this. These are fairly expensive but you can really dial them in to within a couple degree range. Here is the one I’m leaning towards.
 One thing to remember if you decide to do this is that this short-circuits your built-in defrost cycle. This really isn’t a major concern, though, because the door is closed most of the time. There isn’t a continual influx of moisture. However if you open the door to the kegerator a lot or live in a very humid area, you might find a lot of ice build up.
If you need a little more help or would like to just watch a video of someone making a kegerator you can watch Chris Knight in the video below. he uses a different fridge (which I believe is discontinued) but he demonstrates several of the same techniques I used.

This information really helped me, I am sharing with a few friends.
Love your site man keep up the good work
Glad I found this keep up the good work
Nice. Question for you or anyone else. I’m converting my own mini-fridge to a kegerator. I was wondering why you put aluminum tape over the insulating sealant on the hole through the top o the kegerator. Isn’t aluminum a conductor and not an insulator (of heat and electricity)? If so, I believe it would conduct the cold air around it and not insulate. Maybe I’m misunderstanding this though, as you seem to know what you’re doing.
Any explanation is welcome. I’m just going to put silicone sealant around my hole, then tape over that. The question is what is the best kind of insulating tape to use.
Ross,
The reason I selected aluminum tape is that it won’t break down in the presence of moisture and is resistant to corrosion. Aluminum is not a conductor of electricity, but it certainly does conduct heat. However, the purpose of this tape is simply to keep moisture out of the insulation. There is not substantial surface area to worry about losing heat through it. Especially since it only contacts areas that would already be in contact with metal. I really wouldn’t worry about losing any thermal insulation through the tape.
If you do choose to use another tape or something else to seal the insulation, be sure that it will stand up to prolonged exposure to moisture. I hope that helps.
Aluminum provides a better conductivity to weight ratio than copper, and therefore is used in power wiring of some aircraft.
Actually, While aluminum is an excellent electrical conductor, it is less conductive than copper. It is used in aviation industry because it is much lighter and generally cheaper than copper. But, none of that really pertains to its use here.
Aluminum is a great conductor of electricity, but I think it is a good choice for sealing out the moisture.
You are correct. Aluminum does conduct electricity. My bad.
It looks like (on that last picture) you’re still getting moisture on the inside of the plexiglass on the door. Having just discovered that I, too, am getting moisture, what are your thoughts on sealing that somehow?
There may have been a little moisture initially, but I haven’t continued to have that problem. I think it might have just been some moisture that was trapped in there when I attached it. I wouldn’t anticipate continual moisture problems because the humidity in the fridge should be very minimal unless you are opening it frequently.
Howdy – I used this post, among others to convert the same fridge. Already, I am thinking about adding the Johnson controller into the mix to control the temperature with precision.
Did you ever go that route? If so, how did you snake the probe inside the fridge? Will it fit through the drain hole, or did you need to drill out a hole somewhere in the back?
Thanks!
I haven’t made the step to get the temp controller. It is still on my wish list, but it keeps getting out prioritized by other things. So, I’m sorry I can’t be much help to you. However, I would imagine that you could simply put it through the door gap if you don’t want to drill any additional holes. The door seal should just go around the wire.
Nice job- thanks. I bought the same fridge but they now bond the plastic panel to the inside of the door so I’ll be cutting it off instead of unscrewing it. Thanks again!
Yup, same deal with my fridge. I had to pry the plastic off.
Happy to say I just got my Danby DAR440BL in yesterday (bought it off amazon) and I am following your steps this Saturday. Thanks for this guide!
I am just starting to learn about kegerators and already have the correct fridge sitting in my shop…but, have one dumb question. What is the purpose of two kegs? If one keg has the beer and a separate bottle has the CO2…is the second keg a spare to quickly replace a drained first keg?
Well…one more question while I am at it!
You have the two-spout keg tower but only one CO2 bottle. Does this mean only one of the spouts can work at a time or does the CO2 bottle somehow feed both kegs so you can have two different beers come from their own spout in the tower?
Darn informative site…for sure!
Bob,
Thanks for the questions. There are two kegs and two spouts on the tower so that you can have two beers on tap at the same time. The one CO2 bottle can certainly dispense both kegs simultaneously. If you follow the link to the kegging system I bought, you can see that it has a dual gauge regulator. This means there are two valves and two gauges, one set for each keg line, that allow you to set different pressure levels for each keg. The regulator has three gauges, two are for showing the pressure in each keg, and the other one shows you how much pressure is left in the CO2 bottle. Hope that helps. Let me know if you have any other questions. Good bless.
Thanks for the very quick reply! You answered my questions perfectly as I did go to the kegging system and saw the it had the regulators/gauges. Seems I will be ordering this system as I can now have a beer and the friends can have another choice. Just what I needed to know!
Bob,
I just converted and thought I would add what I did to the top. I cut my hole 1 1/2″ with a holesaw. I went a got a plastic tail piece for a sink. It just happens to be the right diameter and has a small lip so it won’t fall through the hole. a small bead of silicone and I am done..Rudy
Now that is a pretty elegant/simple solution….thanks!
Thanks for this detailed info. I’m planning on converting the same fridge & this was really helpful. I have a question about setting up an external temperature controller. If the internal thermostat shuts the compressor down until it warms up to 45 degrees, would you have to disconnect the thermostat for the external controller to work? Is that something that’s easy to do on this fridge?
Bruce,
No, you wouldn’t. The way the external temp controller works is that it removes power (unplugs) the fridge whenever it gets too cold and turns it back on whenever it gets too warm. All you have to do to the fridge is adjust the internal temp setting to full cold. That way whenever it turns on it will be trying to cool down to the low temp setting. The external controller will shut it off when it reaches your external temp setting. Hope this helps. Let me know of you have any other questions.
Bob,
I’m getting ready to do this and had a question. Could you have used plywood to mount the tower on the top of the fridge in between the plastic top to do the same thing as the cutting board inside? It just seems a lot easier than cutting the cutting board around the thermostat and light. Or even the cutting board on top of the fridge instead of inside? Thanks for the how to by the way.
Bob, I’m not sure I understand where you are suggesting the plywood go. What do you mean by in between the plastic top? You could place plywood or the cutting board on top of the fridge if you want. Since it is exposed to ambient environment it probably wouldn’t rot on top. It wouldn’t look as nice, though. It would be kinda ugly, but you may not care about that. The reason you have to use something like the plastic cutting board if you put it inside the fridge is because it is so damp in there. Wood would rot inside the fridge.
What is the point of the plexiglass on the door? I don’t get that part…
The point of the plexiglass is to keep moisture out of the insulation on the door. Otherwise the insulation would breakdown over time. I had to remove the plastic on the door which exposed the insulation.
On my danby there is a plastic top held down by 6 screws. Underneath this plastic was a piece of styrofoam (around 12×12 and a 1/4 inch thick) that I guess is in there to make the plastic top not flex down. It seems like you could glue down a piece of wood around the same size as the styrofoam directly to the metal frame of the fridge and resecure the plastic top. Also any suggestions on the size of hole I would need to cut into the top of the fridge? I would like to accommodate a enough room for two tap lines and a cooler line. I assume the smallest hole possible would be best?
You started out at the top that you used a dar440bl frig. And at the end you used Sanyo 4412. Is one better than the other?
Thank you for your time and help.
Richard,
If you read what I wrote you will see that I used the Danby. The only mention of the Sanyo is in the YouTube video at the end. I didn’t make the video. I prefaced it by saying the following:
So, I have never tried doing it with the Sanyo. I believe that fridge is discontinued. The video was just provided because it demonstrates a few of the steps I used. Good luck!
My error. Sorry. Thank you for your quick response and setting me straight. I shall get a Danby.
Bottoms up
God bless
is there a way to find out where the refridgeration lines are on the side of a larger fridge? we want to put one on the back side of a wall and put the tap faucet on the wall side above the bar but I don’t really want to ruin a fridge
The only way I know for sure is to call the manufacture and ask. Alternatively, the method I suggest in the page above (and that Chris Knight demonstrates in the video above) can be very effective in identifying where the refrigerant lines are. Basically you form a paste out of corn starch and rubbing alcohol and smear this over the area where you want to drill. If you turn the fridge on full cold for 45 min to an hour the refrigerant lines will dry out the paste and you can see the lines clearly. If you don’t have any dry lines in the paste, its a fairly safe bet there are not lines there. I would still drill slowly. Just go through the metal and stop to inspect the insulation to make sure there is nothing there before continuing. You also need to look to make sure you aren’t drilling through any wires. Good luck!
Jake
great post! Found it pretty helpful, thanks
weird how you mix in comments about Jesus and God into a forum about making a kegerator. I find it annoying when people do this kind of thing. Just write about what you enjoy doing — you don’t have to justify it with rationalizations about how it also fits in with the religion that you were taught when you grew up!
Robert,
This blog isn’t a forum about building kegerators. The only reason that page is here is that I built one and thought it might be helpful to others to know how. This is my personal blog about two things I love: brewing beer and Jesus Christ. I am doing exactly what you suggest I should do, “just write about what I enjoy”. These are two of my passions and I do think they are very much related.
I’m not rationalizing anything. I am just explaining why I love both of these things enough to write about them. If the blog is interesting or helpful to you, then read it. If it isn’t, then don’t. If you find my blog annoying, then don’t reading it. I might ask why you care so much? What seems “weird” to me is why you would bother to read multiple posts from a blog and then complian about how annoying it is. No one is forcing you to read. Perhaps there is another reason you have such a reaction?
As it is, I’ll continue to write about what I am passionate about. My faith in Jesus is much more than a religion I was taught as a kid. It effects everything I do. It is an enormous part of who I am. I can’t separate it out from the other areas of my life. I cannot cease to be who I am.
I wish you the best and I hope you do continue to read posts here. If it helps, you can use the category filter and only look at posts that relate to beer and brewing. That’s why I added the category selection feature. However, I cannot promise that I will never mention God in those posts either. That’s what you get with me, and I don’t apologize for it.
God bless,
Jake
Amen
Did you seal the holes where you drilled through for the bolts? And if so what did you use? I just finished my danby and sealed them with some clear silicone. I did just notice today that I have a little frost build up on the cold plate just below the tower. Thanks for the info on the door seals. Hopefully thats it.
Colin,
No, I didn’t seal the holes for the bolts, I don’t believe. It would probably be a good idea to do that, though.
Thank you so much for creating this post. I’m about to embark on kegging and hope to make a kegerator out of a newer version Danby 4.4-cu. ft. fridge. Can you tell me the dimensions of your kegs (and are they considered “low profile” or not), as well as what is the dimensions of the footprint in the fridge where they sit? It is my understanding that the refrigerator that I’m planning to buy (model DAR044A1BDD) is virtually identical to the one you wrote about. The only difference is the shelves are shaped differently (I got this info from a Q&A on Walmart’s site, answered by a Danby representative). Anyway, since there are a variety of corny keg types with ball locks out there, I would like to know what you’re using so I can avoid a big bad surprise! Thanks again!
Erika,
I haven’t had an opportunity to measure my kegs, but they are standard Corny kegs (from a soda machine). They aren’t low profile. I will try to take some measurements for you when I get a chance. Let me know if you still need this info.
Hi Jake, No, no need for the info now. I took the plunge and bought the fridge. Two standard kegs will fit, albeit snugly because the new shelf design involves how they mount into the fridge. In your model the shelves hook into bracket bars in the back of the fridge. In this newer design, they made slots/ledges in the sidewalls of the fridge for the shelves to sit in (sort of like how an oven racks work). This means that the usable width of the fridge is a bit narrower, but it is still workable for 2 kegs and a 5-pound CO2 tank. Of course the guts of the door has to be removed. I’m only telling you all of this here for the benefit of anyone else planning to get the newer Danby fridge. Thanks again for this post; I’ll be converting my fridge to a kegerator after the holidays.
Jake- Best mini fridge conversion post I’ve read. Do you know if this fridge would accommodate one or possibly two 1/6 kegs? I would guess the coupler would be the potential snag, as they are only ~3/4″ taller than the corny kegs. I have read that refilling corny kegs is hit or miss depending on your state (I’m in FL), and I’d like the option to just drive down to Total Wine and bring a 1/6 barrel home.
You can fit a 1/6 keg in it….what you can’t do is fit two of them….I know.. I just failed
It is certainly big enough to fit two standard corny 5 gallon kegs.
Fur that kind of money!, way not just buy a new one.
I’m sure you could do that, but you will likely pay a couple hundred dollars more with everything I priced here (including kegs, regulator, and tank). This is definitely cheaper.
I just got a True Stand up soda cooler with pull out door’s any idea’s on how I can make a kegarator out of it….to give you an idea of what it looks like..it’s the cooler you find in front of the grocery store by the cash register usually have sodas inside
Bob,
I think I know what you are talking about. It’s one of the ones with a big glass door, right? Is it the full size kind that is as tall as you (like the kind in a gas station) or one of the shorter variety, like the ones up front in the grocery store? Are you wanting to keep the see through feature, or would it be ok to take out the glass and put something in that you can mount the dispenser to? If the latter, I would suggest you figure out a way to remove the glass and replace it with something that won’t get damaged by water. The easiest thing to use would be wood, but if you use that you would have to completely seal the side that will be inside the fridge. You may be able to use marine lumber. You need something sturdy enough to mount the dispenser to. On the inside, I would also consider attaching some hard insulation to the back of what ever you use to replace the glass. You can buy it at Home Depot or Lowes. It comes in sheets of various thicknesses. I would gut a whole in this insulation around where the dispenser will attach. That way you are still mounting the dispenser to the sturdy surface.
If it is a shorter soda cooler, you could mount a keg tower on top (like I did with the fridge in the example above). The tricky part is making sure you don’t have any refrigerant lines running over the top. But can check for that using the method I describe here.
Hopefully that helps some. Good luck!
Jake